Showing posts with label Unit 30 - Camera and Lighting. Show all posts

Monday, 26 November 2012

Microphones


Boom Microphone?
A boom microphone is a directional microphone mounted or attached to a pole or arm and is used mainly in film and television. A boom microphone gives the amplified audio of a traditional microphone; they also amplify a group conversation, as it can be positioned so that everyone's voice can be heard. Boom microphones are sensitive enough to pick up vibrations  from movement, like unsteady hands. To avoid this boom mics often include isolating mechanism, such as foam padding or elastic suspensions.

Things to consider when operating a boom microphone

  • you need to make sure that the boom mic doesn't creep into shot
  • some boom microphones run by battery, therefore it is important to make sure the batteries are charged before filming
  • finally, sometimes when using the boom microphone more than one person is required to operate it. for example when a person in being filmed walking forward the person holding the microphone is required to walk backward, so to avoid any accidents 


Using the Boom Microphone 
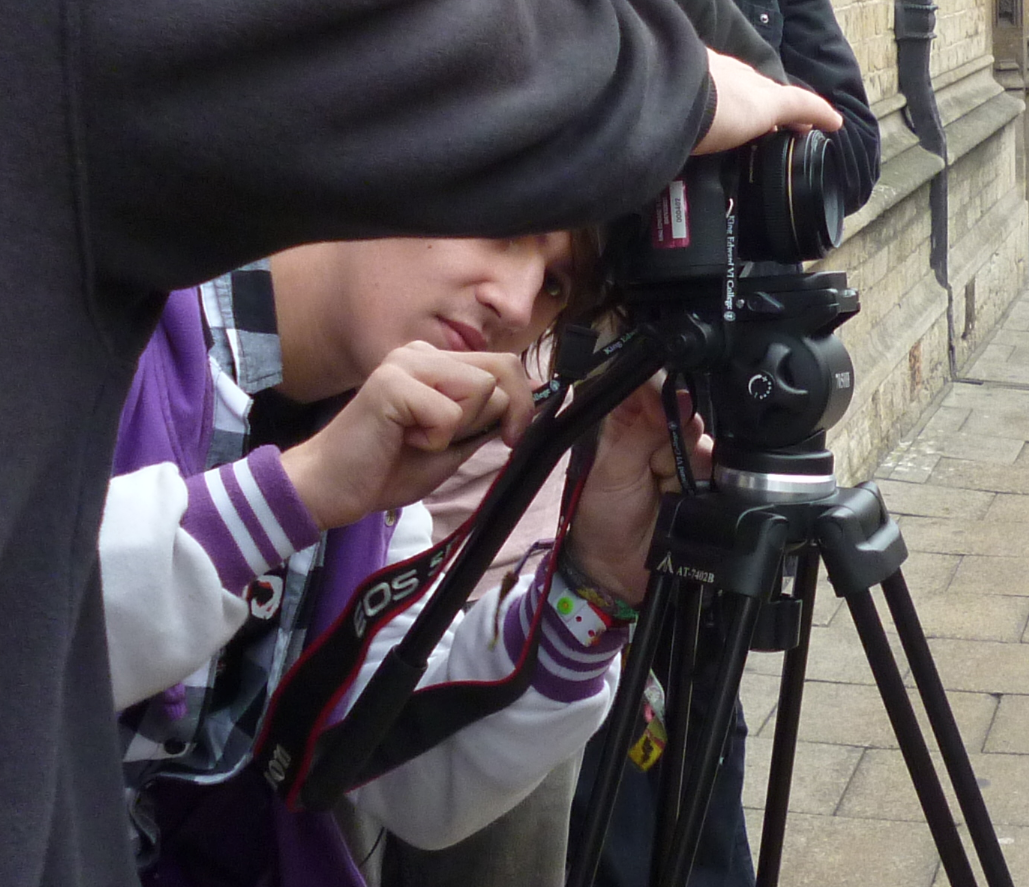
One thing that was on the brief was to retrieve audio footage by using the boom microphone. We had already been given a demonstration and learnt how to assemble and operate the boom before we left for Oxford, as part of or preparation. So this would not be an issue when it came to using the boom when on location. 


We eventually used the boom when interviewing the owner of the Truck Music Store, and asked him a few question about the local area, and gain a lot of interesting information on the decreasing number of record stores, not only in the area but in the city as a whole. when using the boom mic on location everything seem to be working fine. however when we were back at college the next day and were reviewing the footage and audio we had collected from Oxford we soon came to realise that our interview with the boom mic was distorted, muffled and the music coming from a near by speaker could be heard over the gentleman. 


We realised that the boom mic was too close to the speaker above, so it picked up the background noise more so than the interviewee speaking. I found this annoying as the rest of the footage was shot well; the rule of thirds was considered and kept to; the aperture, ISO also considered.

 Despite the small lens opening due to small aperture, the background behind the interviewee is quite over exposed. we could have reduced this by lowering the ISO, as I feel the aperture (around f/16) was a good for this shot, as the majority of it is in focus, and allows the audience to see the surrounding of the shop, capturing the realism of outside. 

Using the Internal Microphone
Fortunately at the same time as filming the interview, using the boom mic, we had another camera set up filming cut away shots of the interview. The internal mic of the second camera managed to pick up the audio, and was in fact clearer than the audio in the footage using the boom mic. this is due to the fact that the internal mic is not as sensitive as the boom mic, therefore less background noise was picked up. 

Oxford


Why Oxford?
Oxford offered a different environment to collect footage in and allowed use to venture out of the comfort zone of Nuneaton.  We where challenged to fend for ourselves on a location and we encouraged to pre plan and organised ourselves before and when we were there. 


The weather wasn't the best but was also not a suveriour issue, as light drizzle was predicted but it never rained. The day had a lot of over cast and was very dull; however i found this to be a plus as is stopped the nautral lighting from being intermissant, so all the footage had the same lighting, this would later come in handy for when editing and trying to keep continuity (even though this is not a problem in new wave films).


Filming On Location
Location: Oxford
Date: 22nd October 2012

Brief: To practise filming in a location outside of nuneaton; capture the essence of the area and film colourful environments. 

·      Equipment Used
·      Canon 500D
·      Canon 600D x2
·      Fluid Head Tripod
·      Small Lumix digital camera 
·      Boom Microphone
·      Spared, Cleared SD Cards
·      Reflector
·      Umbrella 


·      Experience
      I really enjoy filming in Oxford; it was more picturesque and had a larger variety of environments than those found in Nuneaton. I found the experience to be different filming on location in Oxford compare to filming on location in Nuneaton, as people were more accepting of use filming in the street and they tended to stare more and just carried on with what they were doing. I liked this as we didn't have to waste time explaining to curious people what we were doing, we could just get on with filming and move along. Because the people there were more excepting of use filming it was easier to ask for permission to film in shops, in particular at the Truck Music Shop, as the man who ran it said that he had to go throughout the same experiences when he did a film course so he was more than willing to let us use his shop to film in. 

Problems 
For the majority of the day everything ran smoothly, but we did rub into a few problems.
The first problem we can across was a minor one; the permission sheets we forgotten. However Sammie had the permission slip on a memory stick so we found a library nearby, by looking on google maps in our phones, then we printed one off and photocopied several.
The second problem was an issues as the tripod plate was missing where the camera attaches. at first we  thought that we would not be able to use the tripod, which was annoying as we had found a colourful street that we wanted to get a pan of.  but we managed to secure the camera to the tripod with our college lanyards. Surprisingly this worked effectively and the camera was steady and secure on the tripod, but as an extra procaution we kept our hand on the camera at all times when attached to the tripod.

When we were back at college the next day and reviewing the footage we had collected we realised that our interview with the boom mic was muffled and the gentleman could not he heard, only the music coming from the speaker, which the boom was next to. when using the boom mic, the man was being pick up mores than the music, so we thought that the positioning of the boom was okay. (I will discuss this further in a later post).

Cowley Road 
A - Where Bus Was Parked, B - Cowley Road
Cowley Road was the first location we were going to film; we decides this because it was the farthest location away from where the bus had parked. even though we knew it was far it took longer than anticipated, one, because it was far away and two, because we stopped on more than one occasion to shoot places we came across on the way to the location that looked interesting. These frequent stops did effect our timing schedule, so we didn't have enough time to visit the last destination we had planned to go to - Jericho- but, it did provide us with interesting, useful and different footage that we hadn't intended on shooting.

Firstly when we where walking to Cowley Road along High Street we came across some very colourfully painted building and straight away we were able to cover one of the brief points to capture different coloured environments. This is where we first realised that we did not have the tripod plate and had to attach the camera by lanyards. we could have used hand held camera but we felt it would look better on the tripod. 


Along the way we passed a small alley as decided to shoot some footage here as it was different to anything we had seen in Nuneaton. This footage gave a indication to the place where we were, and i also feel that it fits in with the New Wave themes capturing real areas. not only because of this but also, the people passing by look at the camera and this shows a real environment with real people and not actors. 
Also in the alley we were able to contribute to one point in the brief of capturing colour. we did this by filming the brightly painted houses that were down the alley. 
 

Mr. Simms Olde Sweet Shoppe 
A - Mr. Simms, B - Cowley Street
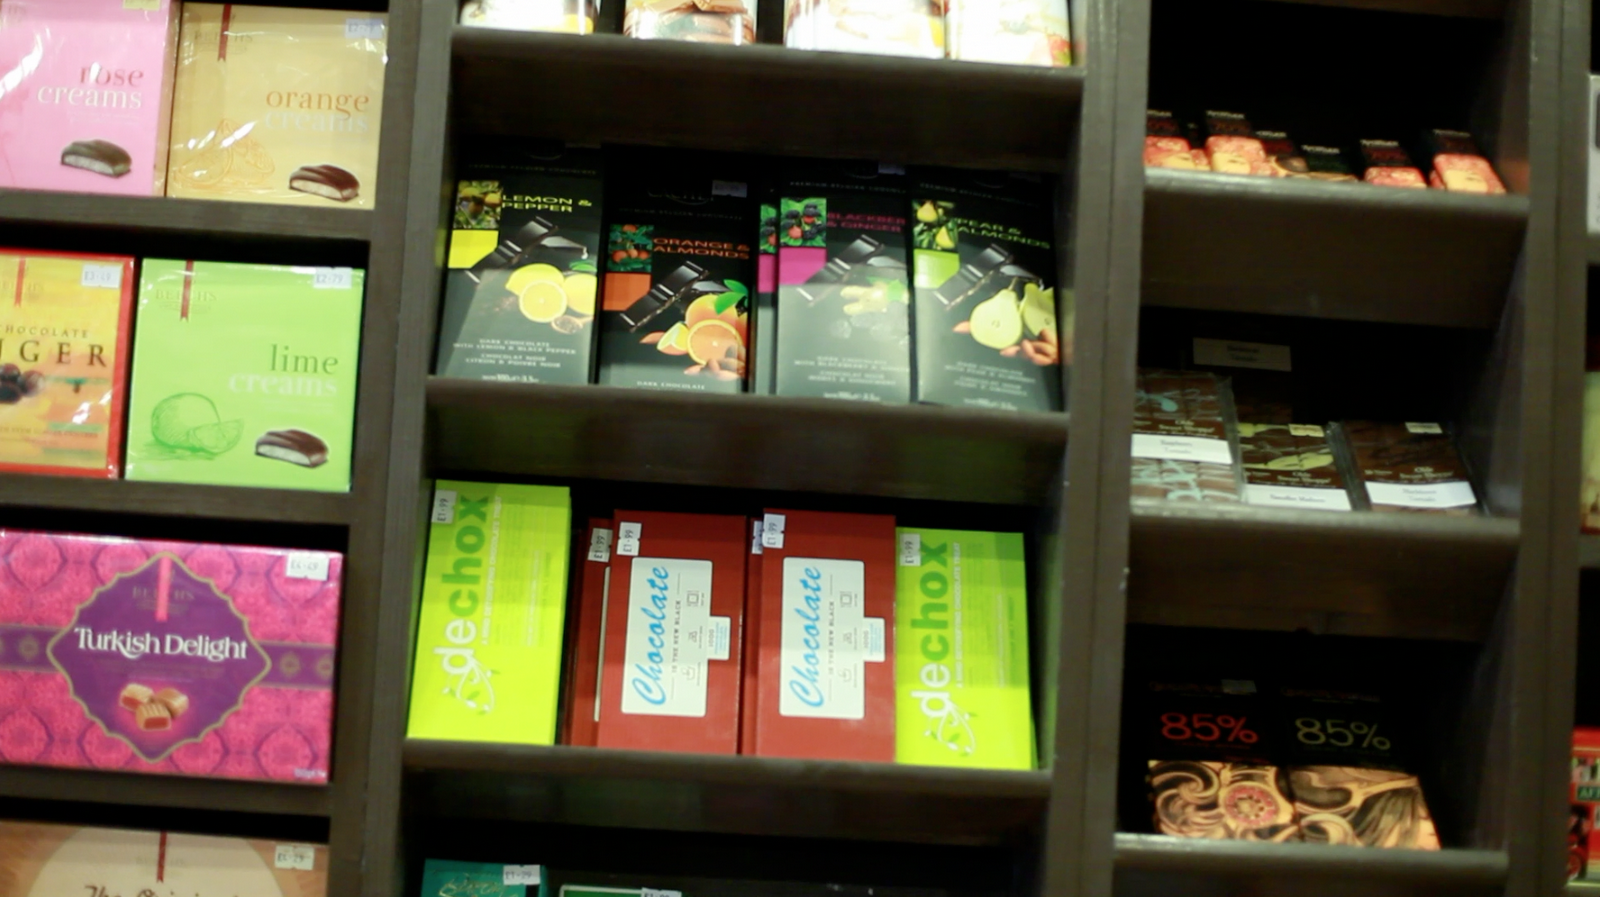
Another stop along the way was an old-fashioned style sweet shop that was brightly coloured, called Mr Simms Olde Sweet Shoppe. We decided go go inside and collect footage here as we felt the shop offered a vast amount of colour and interesting shoots and lighting. we had to experiment with the white balance as the lighting in the shop caused to footage to have an orange tinge to it. we knew it was the lighting in the shop and no the white balance being off on the camera because the white balance that the camera was set on didn't distraught the footage we gathered outside. We upped the k value to add blue to the footage which made the images look much more realistic and the array of colours could be seen more clearly. 


Screen shot of the footage without adjusting the white value. The colours all have an orange/red feel to them and causes the colours to almost blend in together. 

Aperture: f/22.5, Shutter Speed: 1/500, ISO: 3200 and White Balance: 8000k  

Screen shot after adjusting the white balance to about 2500k. The colours are more defined and vibrant.

We left the aperture and shutter speed the same but changed the ISO setting to 64 and the White Balance to 2500.

Before any shooting we had to make sure we had permission from the store owner/manager and get them to sign the release form. We approached one of the staff members, explaining our project and what we would like to shoot inside the shop and from this we gained permission and had the release form signed as long as we did not film any of the customers that came into the stop. We happily agreed and because the shop was fairly quiet for the most of it it as easy not to film any customers. 


After we had permission we set up the equipment, keeping the equipment we were not using out of the way tucked in one corner so that we didn't trip over it and neither did any customers that were in the shop or going to be. because the shop was fairly small we were very careful of how we manoeuvred around the shop and where we placed our equipment, so not to damage the shop of cause harm to any of the people in the shop or ourselves.

Footage Analysis

Off Tilt Camera 
       For most of the shots that we tool in Mr. Simms we ignored the rule of thirds to emphasis the subject's symmetry. This worked for the mostly and the symmetry was seen, however the camera was at a slight downward tilt to the right. This could have been down to the camera being attached to the tripod by lanyards, but if we had noticed at the time (which i didn't until the next day, when reviewing the footage) the tripod could have easily been raised on the right side to even the tilt out. When a symmetry shot was taken without the tripod there was no tilt and the symmetry was clear.

This is a screen shot that shows a downward tilt to the right during a shot. this tilt is made more noticeable because of the symmetry within the shot, which was meant to be even.  This shot was taken on the fluid head tripod.
Here is a screen shot that shows an hand held shot with no tilt and the symmetry is seen and can be appreciated. 


The above clip shows the slight tilt that was on the camera

       We did purposely take a shot that was completely off balance. this gave the footage a dream like appearance as well as the pastel colours that were in the shot, and help to fit one of the New Wave techniques of unusual camera angle. 


Colours 
Pastel Colours 
Bright Colours
We gathered a vast scale of colours when filming in and around Mr. Simms. Inside we were able to capture light pastel coloured scenes and one the other end of the scale vibrant bright colours. and when we ventured outside the colour where duller, with browns and greys. 


Also when we went outside and crossed the road to get some footage of the front of the shop the grittier side to oxford was seen; this was only about twenty metres from the picturesque scene. Here social realism can be seen. 


We eventually made it to Cowley Road after multiple stops and shot a small amount of footage in 'grittier' street and got some lovely shots of a large wall of graffiti, providing brilliant contrast to the earlier footage of the day. 

A few seconds past the wall there was a very colourful bench; this would not only help to fulfil one of the briefs criterion of capturing colour but I thought that this would be a perfect opportunity to get footage from a different angle (this off angle shot is hep to meet a New Wave technique of unusual camera angles).  We used a small aperture, f/22, so all of the shot is in focus.  As for the positioning of of the bench, I feel that the bench is nice and central and the set up of the bench  drowns the eyes and focus in.

Truck Music Store
After this we headed straight for the record store that we had intended to go to in the first place, once again we had to ask for permission, which the shop owners were more that happy to give, and after a short explanation of what we intended to do we began setting up. We also took this opportunity to ask the manager if would like to take part in a short interview which gave us chance to set up and make use of the boom microphone ( I will disgust this in more detail later on). 

The Turf Tavern 
From here, we went on to find The Turf Tavern, a small famous pub situation off an alleyway in the heart of Oxford, and again got permission from a member of staff to film there and proceeded to get some beautiful shots of the very picturesque location.

We got some shots of fire, as this was a new kind of footage that we had not obtained before. Also we introduced a character in to our footage so that we did not just have random clips from different places within Oxford  the character will allow us later to edit the footage together and create a narrative. 


Overall 
In  the end, I feel that the day was a success; helped by the planning done the day before. We managed to collect footage that was on the brief as well as extra footage that we did not intend to film.  because we capture more footage from other unscheduled areas of Oxford I am not to concerned that we didn't manage to make it to Jericho. 


New Wave Conventions Checklist


·      Hand-held 
All of the footage that I filmed I did hand held. this was mainly down to the fact that to attach the camera to the tripod I would have to waste time trying to tie it to the tripod head; and as we had a limited time in Oxford, I didn't want to waste any time with that when I could just hold the camera (and as hand held footage is an aspect of new wave I wasn't too concerned with using the tripod).

·     Long takes/tracking shots ✗ 

·     Youthful iconoclasm 
I feel that this was capture in the record shop, and showed the difference between the youth of Oxford and Nuneaton. 

·      Political and/or social troubles captured ✗ 
I feel that there were not that many obvious political or social problems. unlike the area we visited in Nuneaton  the areas of Oxford were in better condition, with no litter visible on the streets, and the little litter I did manage to find was in a open drainage system that was hidden away. also there wasn't any vandalism, like graffiti - even though there was a wall of graffiti it added beauty to the area rather than ruining it. 

·      Homemade accessories/innovative camera movement ✗  
There were not any opportunities to practice this new wave technique. the only one that we would have had would have been a long tracking shot on the bus, however the windows did not open so the reflection and glare off the glass would have been visible in the footage. 

·      Documentary feel ✗ 
Personally I feel that we achieved this, somewhat. All the people in the clips were not actors - even thought they seem used to the camera's, maybe because of the high tourist numbers in the area. Some of the by passes look directly at the camera, this i feel helped with the documentary feel. What also adds to the documentary feel is the interview we conducted in the record store. CLIP

·      Friends used to act or as crew ✓ 
We introduced Jack as a character  this was done to help with future editing and give a narrative  but also helped to fit this new wave criterion of friends as crew and actors to keep a low budget.  CLIP

 ·  Unbiased and personal realism ✓  
(In this case the realism was unbiased, as we did not completely know what to expect when visiting Oxford. We where fortune enough to be able to catch both sides of Oxford; the side that attracts tourists and the realist side, of graffiti and dying businesses.  

·      Real locations/ environments ✓ 
As the main brief was to film the streets of Oxford, this was checked straight away; we also managed to shoot in real locations of shops (something we had not done before)

·      Improvised dialogue ✓ 
During the interview with the record store managers we did a Q&A session to create spontaneous dialogue. 

·     Take the audience out of the film/direct address to the camera ✗ (

·      Establishing shots 
We only took a few establishing shot and they were from ground level and captured the essence of the area. An establishing shot that we took of the building across the street, not only check the new wave point of establishing shots but also tick the brief by capturing colour. CLIP

·      Rapid movement 


·      Unusual camera angles 
This was done in Mr Simms Sweet Shop. (Explained more above)

Oxford Preparation


Oxford Preparation
By going to Oxford we where hoping to gather footage that was not readily available in or around Nuneaton and as Oxford is an  intriguing  and architectural place we thought this would be a good place to film. As we where venturing so far from Nuneaton and only for one day we needed to make sure that we had everything laid out, like the equipment we needed, knowing how to use it all, specific locations that we wanted to film, what we wanted to capture (mainly different environment than that of Nuneaton) and have a route mapped out so that we don't waste time walking around trying to look for certain places (as time was so limited anyway). So we assembled an equipment list.

Equipment list:                                                   
Canon 500D                                                        
- Canon 600D x2                                                   
- Small Lumix digital camera (for documenting)        
- Fluid Head Tripod
- Boom Microphone
- Spare, Cleared SD Cards 
- Reflector 
- Umbrella (in case it starts to rains)

Before leaving for Oxford we also have to strongly consider the health and safety risks, as we may come across some risks that we have not already as we are going to a completely different environment. some risks involve, vagabonds, muggers, car accidents and cyclist on the pavements. to avoid these dangers we need to, make sure we stick together, know where we are going, do not approach or be approach by people that look dangerous or suspicious, carry as little equipment as possible, be aware of our surrounding and don't get peoples way and don't venture to places that are far outside of our original scouted areas (Cowley Road,  The Turf Tavern and Jericho).  
These are the location that we have planned to go to when in Oxford


We also prepared and practised with the boom microphone the day before we went to Oxford. We did this as it was part of the brief to test the boom microphone and the cameras internal microphone, and as we had not used the boom microphone before we needed to practice with it and the set up. 


As well as learning how to use all the equipment we made sure that all the cameras were fully charged and that  we had spared SD cards that were empty. 

Low Key Lighting


Why Practise Low Key Lighting?

We decided to practise some low key lighting as we had not really had much experience or previous practise with studio lighting; also we were able to observe and correct OH&S issues in our own studio. 

Brief: To practise low key lighting and demonstrate that we are able to identify and handle OH&S issues on set. 

·      Equipment Used
·      Canon 500D
·      Tripod
·      Small barn doored studio light 
·      Back Drop 
·      Extension cord

·      Experience
            When filming low key lighting I found it very fun. I was comfortable in my environment, as everybody there were aware and knew what we were doing (because they were all participating as well). I also enjoy the footage that we ended up with and how we were able to experiment with the miss en scene more freely than we were able to do when on location. even though this does not completely fit in with new wave techniques, -such as natural lighting, real location and people used and innovative camera movements, to name a few- we did you innovate equipment and cheaply constructed equipment that we didn't have but needed, like a darker back drop made from large pieces of card being taped together; also by compiling all of this footage we were able to practice editing technique, like the Kuleshov effect.

         Footage analysis
  
Lighting
When we were filming the footage of Sammie and Will at the table the small studio light was to bright and lit the scene to much, not only defeating the object of lows key lighting but also the white back drop could be seen and this also took away from the effect. To deal with this problem we used a phone light to reduce the amount of light present and we placed it on the table behind the bowl in the subjects face, this help to light the subject only and not the surroundings like was happening before. 


This clip shows how the small studio light over lit the     This clip shows how we adjusted the barn doors on
scene. Even though a shadow was present on the          the studio light so that the amount of light and the
subjects face the rest of the set and background was     focus of the light was a suitable amount and point in
to bright. Also a shadow is seen behind the subject,      the correct place, in this case on the left side of the  so the positioning of the light is known. I feel the                     dolls face. even though closing the barn doors the
shadow ruins the effect of low key lighting as does        and the light source was reduced that was still a lot of
the back drop being seen.                                           light present, and once again the positioning of the
With this said the creases in the back drop are not        light source is known from the shadow on the back
visible as the aperture is high to only the subject in        drop. the aperture here is the same as before so the
the fore ground is in focus.                                           creased on the back drop are no noticeable; even                          .                                                                           more so because the ISO is the same as before, (a .   .                                                                                   .          low ISO) the back drop is darker so the crease are  . .                                                                                   .            seen even less.
  

Back Drop
 To begin with we had a plastic back drop that was meant to be used for filming and photography like we were practising  however this back drop was to heavy for the stand and kept falling off the roll and causing the stand to become unstable. we fixed this by use a lighter white sheet that we found in the studio. this stayed up fine and did a good job as a back drop, but the sheet was creased and made some shots look unprofessional. when we wanted a white back drop we increased the aperture so that the background was not in focus and the creases were not seen in the shots. 


      Even though the white sheet worked as a back drop, in some shots it caused the scene to be too bright and the low key lighting effect was not accomplished. we tested different ISO settings to see if altering the amount go light entering the camera would make any difference, but this didn't work. So to concur this problem we taped together some black card that we found also in the studio and held them behind the subject when we were filming. this helped to darken the surrounding and helped improve and emphasis the low key lighting effect that we were trying to accomplish. 


 In this clip you can see how the black back drop causes the table cloth and bowl colouring to pop more and stand out. 


  OH&S on set 
       There where a few health and safety problems that arose but we were able to quickly and safety adjust and remove these problems to make the environment safe for the crew.
       The first OH&S was the back drop falling. this was dangerous not only as it was heavy and could fall on to the subject we were filming sat in front of the back drop but also because it caused the stands that were hold the back drop up to be very unstable and liable to fall also. we mended this problem by removing the heavy back drop from the studio and replacing it with a lighter back drop, that didn't fall of the stands or cause hem to become unbalanced in anyway. 

       The second problem was the cable from the extension cord not being secured down. We taped the cable down to the floor and around the chair leg that the cord was on. By doing this any excess cable, that could be tripped over, was removed from the equation in turn removing any dangers from the set, reducing any  harm that to a crew member may come across.

      Finally heat from the studio light was a problem. Most studio lights get very hot when left on for any period time, as we only used a small studio light the amount of heat produce was less than that of a larger studio light, but still needed to be taken into the OH&S account. We made sure that all crew members were aware of the heat from the light and when the light was not in use any more it was switch off and left to cool before packing it away;  this not only decreases the risk of injury and burns to the crew but also prevents and chance of a fire if the light were to be packed away into its bag before completely cooled. 


Wednesday, 21 November 2012

Lighting


The Basics

Soft Lighting 
Soft light is when a light source is large relative to the subject. Things that can effect the softness of the light are : - Distance. The closer the light source, the softer it becomes.
        - Size of light source. The larger the source, the softer it becomes.

Soft lighting is used in photography and cinematography for the following reasons : 
- Shadow-less light is cast.
-  It can be used as fill lighting,  reducing shadows without creating  additional shadows, so doesn't indicate where the supplementary light source is positioned.
- Makes a subject appear more beautiful or youthful through making wrinkles less visible.
- Soft lighting makes the subject very well lit and looks more natural. 

An example of soft lighting is a person (the subject) and the sun (the source). 


 Hard Lighting 


Hard light is when the light source is small relative to the subject. candle light or a concentrated light source  would give this effect. The type of lighting instrument used can effect the hardness. Fresnel lights can be focused so harder-edged shadows are produced, having less transition between illumination and shadow.


Low Key Lighting 
Usually photograph and studio have use three-point lighting, consisting of a key light, a fill light and a back light for illumination. Low-key lighting, on the other hand often uses only one key light, and may be controlled with a fill light or a reflector
Low key lighting is a necessary element to create the chiaroscuro effect and is commonly used in film noir and horror genre films as it tends to heighten the sense of alienation. 


Portrait Lighting
There are three main types of portrait lighting; Rembrandt, Edge and Butterfly. All of these lighting techniques only use one light source, this is cheap and therefore, used in new wave, so by practising and using these lighting techniques we are sticking to the new wave style.

Rembrandt
Rembrandt lighting is characterised by an illuminated triangle under the subjects eye of the shadowed side of the face. It's named after the Dutch painter Rembrandt who, in his paintings often lit his subjects faces in this way. to achieve this type of lighting the angle and height in comparison with the subject must be considered and the degree that the light is pointing (measured from a horizontal plane, like the floor).
- The subject must be placed in front of the camera, facing away at a 20 degree angle.
- The main light source is at a 25-35 degree from the camera, about a foot and a half above the subject and tilted down about 45 degrees also. 
- When using a fill light or reflector this has to be at a 45 degree angle from the camera also but on the opposite of the camera to the light. the reflector will lower the contrast. 


Analysis


As you can see from the clips above, we did manage to achieve this technique, not as distinctively as image above, but the signature light of triangle can be seen, more so without the reflector than with. The footage was edited in high contrast monochrome to show the light and dark contrast more effectively, but also by doing this a style from French new wave has been incorporated


Edge Lighting
Edge lighting is more drastic, defining and separating one side of the face from the other more obviously. It makes the lights light and the darks dark. To achieve this edge lighting, like with Rembrandt, the angle and height in comparison with the subject must be considered and the degree that the light is pointing (measured from a horizontal plane, like the floor).

- The subject must be placed in front of the camera, facing away at a 20 degree angle, once again.


- The main light source is at a 90 degree from the camera, eye level with the subject and kept at 90 degrees to the vertical stand. 
- When using a fill light or reflector this has to be at a 70-80 degree angle from the camera also but on the opposite of the camera to the light. And once again the reflector will lower the contrast. 


Analysis


The edge lighting technique that we practise was done very well; a stark contrast between the lit and shadowed sides of the face was achieved - as the footage above shows. Once again the footage was edited in high contrast monochrome to show the light and dark contrast more distinctively.


Butterfly Lighting
Butterfly lighting is a classic Hollywood technique that offer a much softer way to light the subjectThis lighting techniquhighlights above and below the eyes, while the eyes stay in shadow. The name of this lighting style stems from the butterfly shadow cast under the nose from the lighting angle. The butterfly  pattern can be quite useful for a variety of faces, but is at its best on lean subjects with high and pronounced cheekbones. To achieve this edge lighting, once again like with Rembrandt and edge, angles and positioning have to be considered. 
- The subject must be placed in front of the camera, this time directly facing the camera.


- The main light source is behind the camera, 2-3 foot above the subject and at a 70-80 degree tilt to the vertical. 
- No fill light or reflector is used with this technique as is would lighten the subject to much and the lighting would not be seen.


Analysis
I feel we mimicked the butterfly lighting technique very well. not only have we achieved the correct shadowing and highlighted the cheek bones, we have stay with the typical use of this lighting in the 1930s to enhance the beauty of female subjects, by using a female subject.